Today’s guest post is from artist, author, and all-around lovely person Kate Birch. Visit her blog here and look for some of her own original artwork! Kate took a page out of this week’s book, Okay for Now by Gary D. Schmidt, and gives us this great activity so we can learn to draw from Audubon’s work just like Doug did. Take it away, Kate!
John James Audubon was known for his amazingly realist illustrations of birds compiled in his best-known work, The Birds of America. One of the things that made Audubon’s work so interesting is that the birds actually looked like they were drawn straight out of nature. Audubon did his best to make his birds look as life-like as possible. Because it would be impossible to draw a live bird in its natural setting, Audubon staged dead birds with wires in elaborate sets that he spent days preparing. Audubon knew that to create the most life-like bird on the page he would have to observe the most life-like bird in real life.
As artists, we have to learn to see the world differently. Many people will look at a bird, or a tree, or a plant without truly seeing it. Our brains are used to making generalizations about objects—a bird has wings and a beak, a tree has a trunk and branches—but this doesn’t mean that all birds have the same shaped wings or beaks. Artists have to learn to see each little detail in the world. Artists can’t make assumptions.
One of the best ways to really start seeing the world without letting our brains generalize is to draw upside down. Today, you’ll learn how to take one of Audubon’s birds and learn to see it a new way.
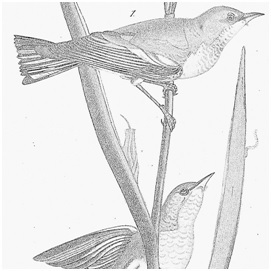
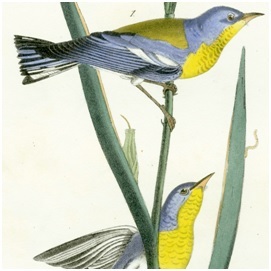
Step One: Print off your favorite of Audubon’s birds. I’ll be using part of the Blue Yellow-Backed Wood Warbler.
If you’d like to make it a little bit easier on yourself you can use this black and white version of the same illustration:

Step Two: After your picture is printed off. Set it in front of you upside down on the table. Now it will look like this when you begin to draw:

Step Three: As you draw, try to concentrate on the lines and shapes that you see. Instead of thinking about drawing the bird’s eye, or beak, or wing, simply think about the lines themselves. Are they short or long? Are they close together? Do they curve?
Step Three: As you draw, try to concentrate on the lines and shapes that you see. Instead of thinking about drawing the bird’s eye, or beak, or wing, simply think about the lines themselves. Are they short or long? Are they close together? Do they curve?
Step Four: After you are done, you can flip your drawing around. Did you draw the bird differently than if you had been looking at it right side up?
Thanks so much, Kate! Can’t wait to try this with my kids!
Step Four: After you are done, you can flip your drawing around. Did you draw the bird differently than if you had been looking at it right side up?
Thanks so much, Kate! Can’t wait to try this with my kids!
